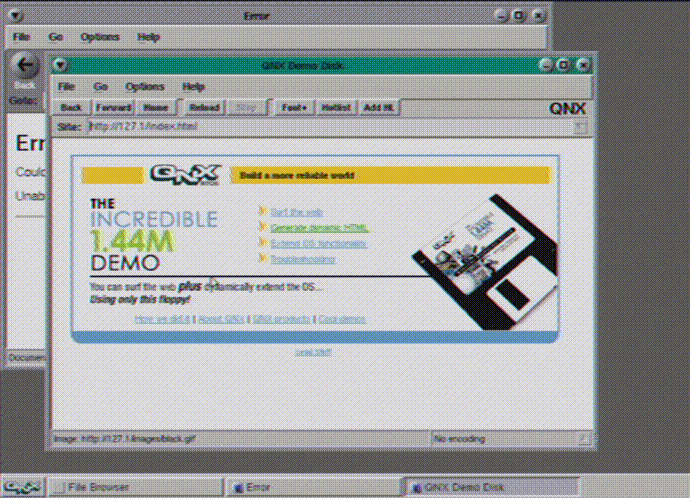
QNX DEMO is the best Operational System between tiny "1-floppy" OS'es. At the same time it the most poorly documented one. Long time ago QSSL discontinued support and removed it from official web page. This page is designed in form to answer SW&HW related extra features, never discussed before.
Therefore, for the experiments with QNX demo is necessary:
1. QNX demo disk Ver.405, preferably network version. You can download them from here:
network 405 version:
modem 405 version:
For faster booting I created boot CD versions of this floppy. I will post her all my collection of boot floppies soon. :) :
2. Working network connection. Still, this is the most critical
point. QNX DEMO network version supports only 3C509, NE1000 and NE2000 NIC's.
3. Local network with running HTTP, FTP, TELNET servers. This is optional, but highly
recommended. The servers can be simplest in the world - use them just for keeping several
files.
Step 1 - preparing
From the first view QNX DEMO looks rock solid - user has very little rights in this OS. You are basically trapped in GUI. Good news came with QNX demo Ver405 there is undocumented "back door". Using file browsers go to:
/usr/httpd/.photon/pwm/pwm.menu
Click and open pwm.menu file. This file controls the menu options. You are allowed edit and save it.
Lets change the line
Towers of Hanoi G voyager -x0 -y0 -h412 -w628 -u
http://127.1/hanoi/game.html
Into something more useful:
Voyager compact G voyager -x0 -y0 -h412 -w628 -c
Option "-c" launches voyager in "compact" mode, thus saving a bit of scarce system memory.
Save the file. If you open the menu now, you see that nothing is changed. You need to refresh the pwm menu.
Step 2 - refreshing pwm menu
With the QNX DEMO Ver.405 QSSL introduced possibility to upgrade the system via installing extra applets. Only 3 special packages were released and you can download them here:
This upgrade option is our long wanted "back door".
Every time you install or uninstall the package PWM menu is refreshed!
The algorithm is very simple:
- Change pwm.menu file in
/usr/httpd/.photon/pwm/pwm.menu
- Install or deinstall extension
- Execute command via choosing the line in refreshed PWM menu
Test compact version of Voyager, without these fancy buttons. NOTE: before opening in "compact" mode you need keep open at least one Voyager window in "normal" mode. Other vice error message "server not running appears".

Step 3 - getting the shell
Well, I tried to create .qnxde applet myself. Unfortunately there is no information available about the format of these files and their structure…. I was getting desperate, but my salvation came in person of my colleague. He gives the following idea about getting the shell.
So there is no more need to create our own .qnxde applets. Take any QNX4 photon application and add .qnxde extension to the file name. We noticed, that QNX DEMO installer works like this:
a) It copies any file with .qnxde extension from external web server to
local /tmp_ram directory.
b) The installer pops up the window with questions "Continue"
or "Cancel". Whichever you press, the Qnxdemo installer detects, that this file
is invalid and erases /tmp_ram directory. Of course, that is not the case with original
QNX extension applets.
So the following algorithm gives you the shell:
1. Add in the /usr/httpd/.photon/pwm/pwm.menu file the following line:
ksh_tmp pterm -z -R /dev/pty/ /tmp_ram/ksh.qnxde
(Important note: PWM menu lines are written like in this example:
ksh_tmp<TAB><SPACE_or_any_symbol><TAB>pterm -z -R
/dev/pty/ /tmp_ram/ksh.qnxde )
2. Download and install telnet.qnxde extension.
3. Download ksh.qnxde from external web
server but when installer window pops up DO NOT press anything. Leave it running.
4. Open QNX PWM menu and execute new line ksh_tmp
5. Oh well, you have shell…. quite simple, isn't it?
Step 4 - ftp is also simple
Let us start again. Shell was nice, but ftp is more useful at the moment. Again:
1. Add in the /usr/httpd/.photon/pwm/pwm.menu file the following line:
ftp_tmp pterm -z -R /dev/pty/ /tmp_ram/ftp.qnxde
2. Download and install telnet.qnxde extension. If it is already installed, you do not have repeated it. We need telnet.qnxde utility only for using pterm terminal that goes with it
3. Modify file /etc/services and add extra line:
ftp 21/tcp
4. Refresh PWM menu by downloading and installing utils1.qnxde official extension
5. Download ftp.qnxde from external web
server but when installer window pops up DO NOT press anything. Leave it running.
6. Open QNX PWM menu and execute new line ftp_tmp
7. Test ftp connection and have fun :)
Step 5 - mounting floppy
QNX DEMO is capable of running almost ANY QNX4 application. The simplest way - accessing floppy.
1. Add in the /usr/httpd/.photon/pwm/pwm.menu file
the following lines:
-
fsys pterm -z -R /dev/pty/ /tmp_ram/fsys.qnxde
fsysfl pterm -z -R /dev/pty/ /tmp_ram/fsys.floppy.qnxde
mount pterm -z -R /dev/pty/ /tmp_ram/mount.qnxde /dev/fd0 /fd
-
pfm /fd/pfm
-
2. Download fsys.qnxde from external
web server; when installer window pops up execute "fsys" line from PWM menu.
Leave terminal window open. Close installer by pressing "CANCEL"
3. Download fsys.floppy.qnxde
from external web server; when installer window pops up execute "fsysfl" line
from PWM menu. Leave terminal window open. Close installer by pressing "CANCEL"
4. Insert QNX4 formatted floppy disk. Again, download mount.qnxde from external web server; when installer window
pops up execute "mount" line from PWM menu. Leave terminal window open. Close
installer by pressing, "CANCEL". Now, via File browser you can see contents of
the floppy in folder /fd
The floppy is yours. Again, it should be QNX4 formatted. You can place on it and execute almost ANY QNX4 terminal and Photon applications.
Step 6 - useful toys
Take control over your file system in comfort. Add line:
pfm_tmp /tmp_ram/pfm.qnxde
...and download file manager: pfm.qnxde
Time is an option? Add line:
pfm_tmp /tmp_ram/pwmclock.qnxde
...and use 386 as wall clock: pwmclock.qnxde
Some updates in year 2005. Just to keep project alive....
Calculator? Add line:
calculator /tmp_ram/phcalc.qnxde
phcalc.qnxde
A few games. Classic Solitaire, mines and more:
Add lines:
solitare /tmp_ram/solitawe.qnxde
mines /tmp_ram/mine.qnxde
solitawe.qnxde and mine.qnxde
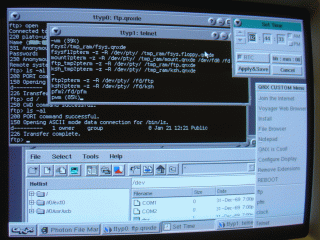
at the end you screen looks like this:

Tips tricks
At the end of experiments I ended up with the following PWM menu of frequent use:
=CUSTOM QNX Workspace Menu
Join the Internet J netcfg
Voyager Web Browser V voyager -x0 -y0 -h412 -w628
Towers of Hanoi G voyager -x0 -y0 -h412 -w628 -u http://127.1/hanoi/game.html
File Browser F fbrowse
Notepad N note
Install voyager -u http://your_http_server_ip/
Install telnet voyager -u http:// your_http_server_ip /telnet.qnxde
Remove Extensions destaller
-
fsys /tmp_ram/fsys.qnxde
fsysfl pterm -z -R /dev/pty/ /tmp_ram/fsys.floppy.qnxde
mount pterm -z -R /dev/pty/ /tmp_ram/mount.qnxde /dev/fd0 /fd
ftp_tmp pterm -z -R /dev/pty/ /tmp_ram/ftp.qnxde
ksh_tmp pterm -z -R /dev/pty/ /tmp_ram/ksh.qnxde
-
ftp pterm -z -R /dev/pty/ /fd/ftp
ksh pterm -z -R /dev/pty/ /fd/ksh
pfm /fd/pfm
umount /fd/umount /dev/fd0
Shutdown S reboot
Unfortunately, it is not possible copy text from voyager window
directly. There is workaround:
Place this list as text file on your telnet server, connect with QNX Demo, open it in
terminal window select copy it to with shortcut: Ctrl-Alt-X Paste in note editor Ctrl-V
Yuo can press <Cancel> in the installer after program is on the screen and download next .qnxde applet
HW issue: Some types of keyboards refuse to work
under Photon. Although they respond perfectly normal during startup phase, they
"freeze" when GUI is started.
The solution: F1-F1 go via diagnostic screen. When GUI appears press <Enter> many
times. Generally 20-40 hits are enough to "wake up" the keyboard and start
working under QNX Demo.
Enabling .qnxde applets direct download from Apache server - suggested by Robert Hart
Sometimes there is a problem with the Voyager browser opening
the .qnxde applets as a text file. The problem is that your Apache server uses a default
MIME type of "text/plain" when the file is of an unknown type. Try adding a file
called ".htaccess" into your directory with the following line:
----------------------------------------------------------------------
AddType application/octet-stream .qnxde
----------------------------------------------------------------------
This .htaccess file will tell the server to send the MIME type "application/octet-stream" for .qnxde files.
Final note:
All the material described is for educational purposes only. I just want to show endless possibilities of Qnxdemo disk. I never had or owned "real" QNX4 OS. All the files described in this article were downloaded from free and publicly available ftp servers.
You can contact me: [email protected]
Sekmes!
Linas